Instead of making dozens of PNG files for all the various screen sizes for icon assets, I wanted to use vector graphics (such as SVG) in an Android app I’m building with Xamarin.Android. There is a tool for generating images, and that’s better than nothing, but SVG is even easier, and I’m all about easier. I thought this would be relatively easy to do, but it turns out Android has no built in support for vector image formats.
Xamarin has a nice binding project and sample for using an SVG library (I think it wraps SVG-Android on GitHub) in Android apps, but it wasn’t clear how to use that, and there was an annoying gotcha I hit along the way, that I thought I’d document here.
There are two projects in the sample solution. One is the library project, and the other is a sample project, with sample art that you can build to see it working. What we want to do is build the library, and then copy the necessary components into our own Android app project. Here’s how to do that using Xamarin Studio.
- Download and unzip the project files from Xamarin (or fork it on GitHub). Open the Solution in Xamarin Studio. You should see something like this:
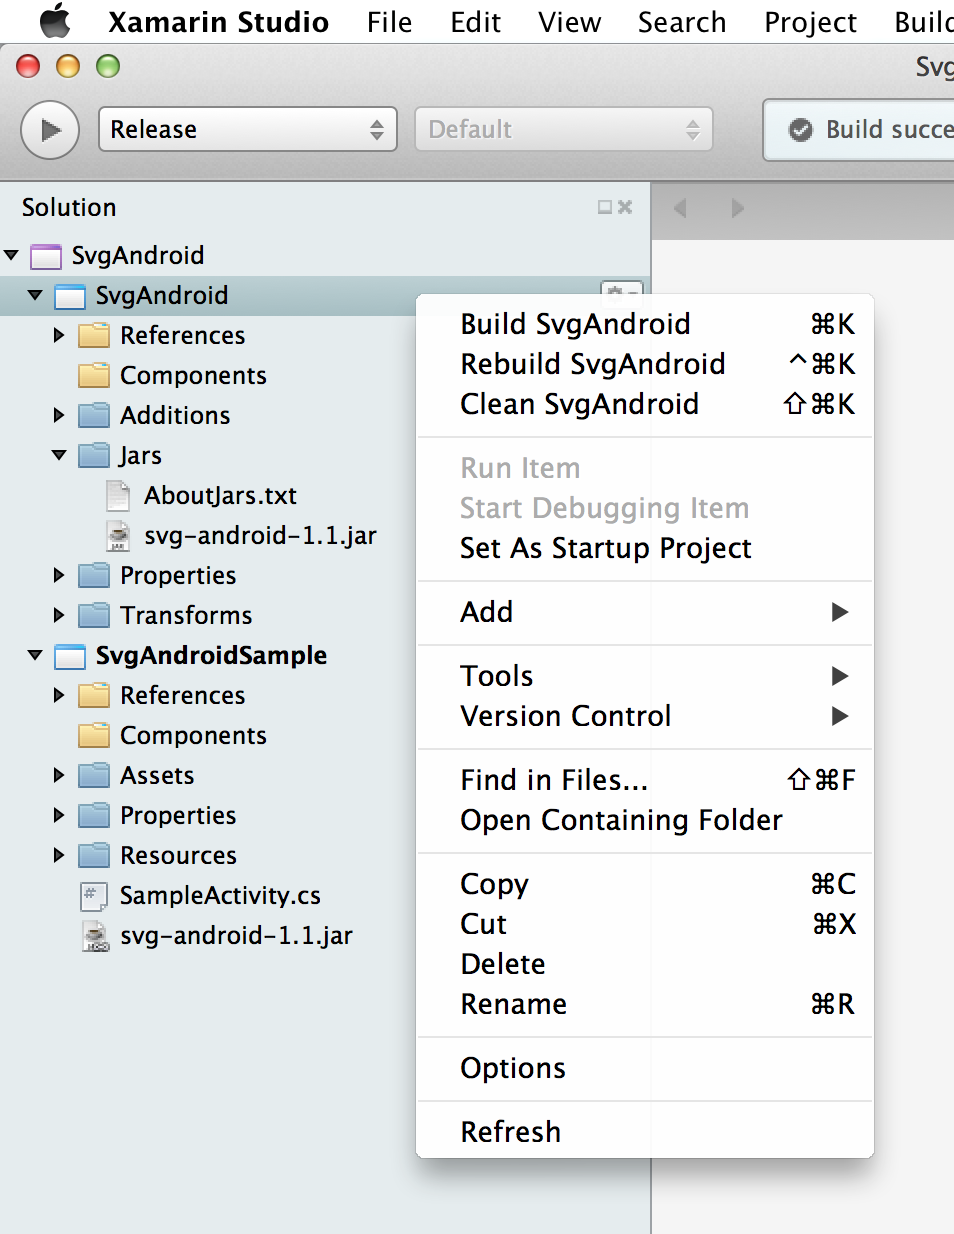
- Put the build mode into “Release” and then right click (or control click) on SvgAndroid (Highlighted in the screenshot above), and then click Build SvgAndroid (or highlight the project and press cmd+K). This will make a release .dll file (a .NET assembly) in the bin folder:
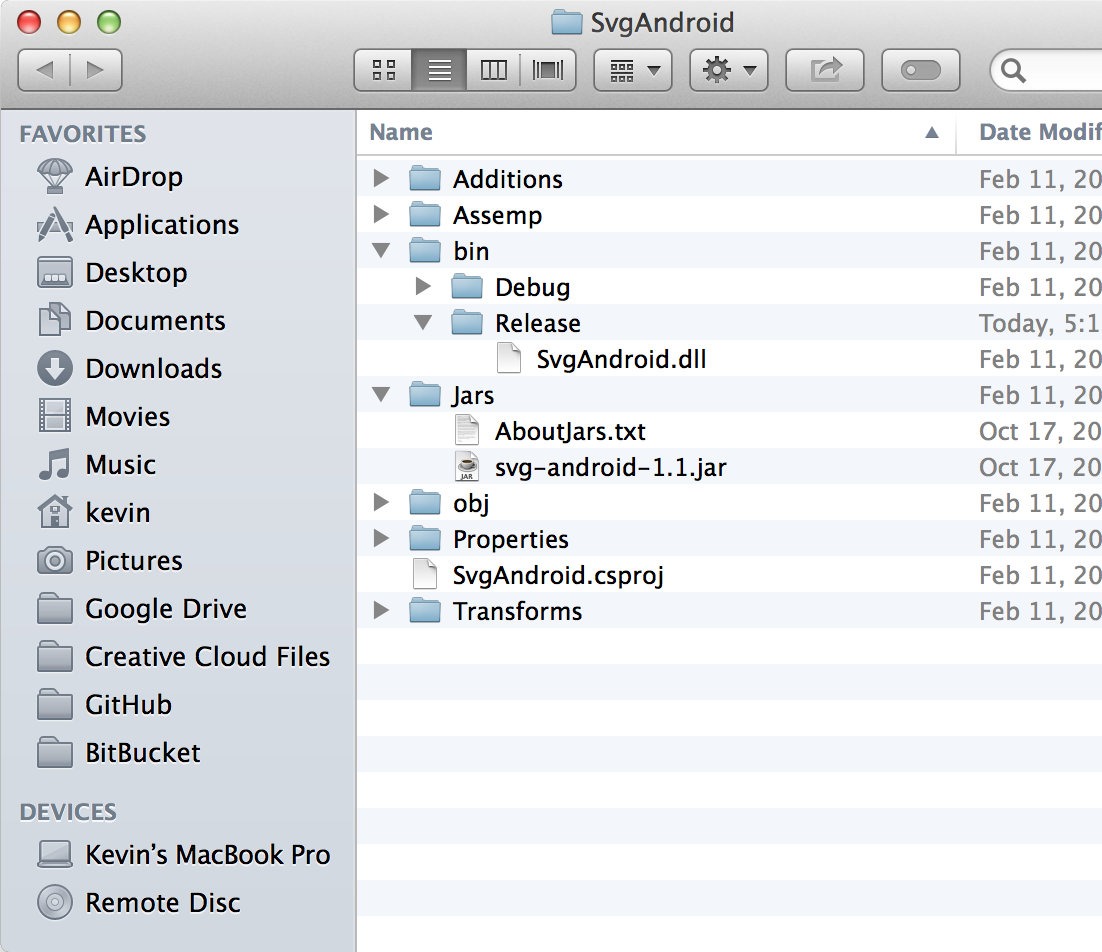
- You’ll need to copy two files into your own project. SvgAndroid.dll from bin/Release, and svg-android-1.1.jar from the Jars folder. I put SvgAndroid.dll file in the project/Assemblies folder in in my project hierarchy so that the dll could be managed in git with the rest of my project (the git rule of thumb – include what you need to build, and I need this dll to build the app). The jar file – svg-android-1.1.jar – went into the project/Jars folder.
- Add the assembly to the project: Right click on references in the Solution panel, and choose “Edit References.” In there, add the .dll under the “.Net Assemblies” tab.
- Add the jar file: Add the jar file to your project using add file or add folder (to add the entire Jars folder). Then right click the jar file, and choose “Build Action” -> “AndroidJavaLibrary” to make sure it gets packaged with your application.
That’s it! Those two files are all you need. Now you can create an SVGView class, and use that in your axml layouts. Here’s a quick and dirty example of the class:
[csharp]using System;
using System.Collections.Generic;
using System.Linq;
using System.Text;
using Android.App;
using Android.Content;
using Android.OS;
using Android.Runtime;
using Android.Util;
using Android.Views;
using Android.Widget;
using Com.Larvalabs.Svgandroid;
namespace unFocus
{
public class SVGView : ImageView
{
protected string svgSrc;
public string SVGSrc {
get {
return svgSrc;
}
set {
svgSrc = value;
setupSVG ();
}
}
public SVGView (Context context) :
base (context)
{
Initialize ();
}
public SVGView (Context context, IAttributeSet attrs) :
base (context, attrs)
{
Initialize (attrs);
}
public SVGView (Context context, IAttributeSet attrs, int defStyle) :
base (context, attrs, defStyle)
{
Initialize (attrs);
}
void Initialize ()
{
}
void Initialize (IAttributeSet attrs)
{
var a = Context.ObtainStyledAttributes(attrs, Resource.Styleable.SVGView);
SVGSrc = a.GetString(Resource.Styleable.SVGView_svgSrc);
a.Recycle ();
}
void setupSVG ()
{
// svg-android doesn’t work in hardware mode, so set software
SetLayerType (LayerType.Software, null);
if (null == SVGSrc)
return;
SVG svg = SVGParser.GetSVGFromAsset (Context.Assets, SVGSrc);
SetImageDrawable (svg.CreatePictureDrawable ());
Invalidate ();
}
}
}[/csharp]
And in values/attrs.xml:
[xml]<?xml version="1.0" encoding="UTF-8" ?>
<resources>
<declare-styleable name="SVGView">
<attr name="svgSrc" format="string"></attr>
</declare>
</resources>[/xml]
Now you can create SVGViews in axml using:
[xml]<unFocus.SVGView
android:svgSrc="svg/somesvgfile.svg"
android:layout_width="58.0dp"
android:layout_height="58.0dp"
android:id="@+id/icon" />[/xml]
SVG files go in the Assets folder, in whatever tree you want. In this example, they are in Assets/svg/. Build action for svg files is “AndroidAsset,” which should be the default.
There is an irritating gotcha, that’ll have you tearing your hair out if you don’t know about it.
SVG files MUST have width and height attributes on the root element to work with this library. If you don’t have them, and Adobe Illustrator CC doesn’t add them by default, the lib will fail with cryptic error messages. The fix is easy enough, just open the SVG in Xamarin and add width and height attributes. There will already be a viewBox attribute with the correct attributes (viewBox=”0 0 70 70″ <– the second two, width and height). You’ll need to add these: width=”70px” height=”70px”.
Update: One other thing I forgot to mention – this didn’t work on the Xamarin Alpha for some reason. The SVGAndroid binding was failing if I remember correctly (at least that’s where the runtime errors seemed to originate). So if you are having trouble getting this to work, it might be something in the Alpha channel.
Update 2: What I’ve showed you here will work, but some folks on the Xamarin forums suggest there may be advantages to including third party code in alternative ways (like including an entire project, etc.). Have a read.
Update 3: SVG-Android won’t work under hardware acceleration, which is enabled by default in apps targetting Android 3.0 and newer. You just get a blank space. The easiest way around this is to set the Application, Activity, or the specific view you are working on to use software acceleration.
I modified the SVGView example above to do this automatically, but you can also do it yourself (using the code above) or by setting the android:layerType=”software” on the specific view (or somethings its parent).
This is worth knowing about because other types of drawables (such as animations) seem to display other types of incompatibilities with hardware acceleration (such as fuzzy low resolution renderings), and setting software mode can fix it.
Enjoy!